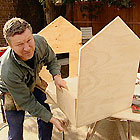
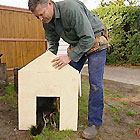
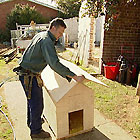
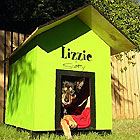
Scott Cam reckoned his best mate, Lizzie, deserved a beaut new home, so he knocked together this top doghouse. Lizzie's kennel design has a number of simple features that make it easy to look after as well as long-lasting. The whole roof can be removed for cleaning, and the kennel itself sits on three low feet, to keep it away from ground moisture and to let cooling air flow under it on hot summer nights.
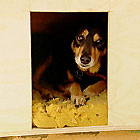
There's no such thing as a 'one size fits all' dog kennel, so first decide what size kennel your pooch needs. If the kennel is too big your dog will be cold at night, and if it's too small, the dog will be uncomfortable and probably won't use the kennel at all. Lizzie is a medium-sized dog, so you can work out the size for your dog's kennel using Lizzie as a guide, and adjust the size to suit your dog. For a medium-sized kennel, you will need:
2 sheets of 18mm weather- shield ply (2400x1200mm)
1 length of 100x50mm H4 treated pine 1800mm long
nail gun and glue to fasten it together (or you can screw and glue for the same result)
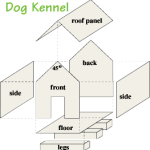
Scott's step-by-step instructions
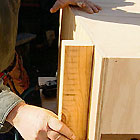
Following the diagram, measure and cut the floor of the kennel out first, 900mmx600mm (medium-sized dog). 
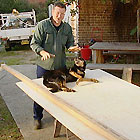
(Tip: pop your dog onto the base to make sure you're happy with the size.)
Cut the front and back panels - these will be 600mm wide and 800mm to the apex.
Cut the pitch of the gable front to a 45° angle to make life easy for yourself.
Next cut the two side panels. These should fit between the front and back panels and sit on top of the base. They are 864mm wide and the height will match the bottom of the pitch at the gable. (Tip: when cutting all these panels, utilise what's called the 'maker's edge'. The edges of any sheet of ply are always straight and true and the corners are always a perfect 90° angle. Use these perfect edges and corners in your work, to get things lined up nicely.)
Glue and nail or screw all your panels together, but before doing so, make sure you cut the door opening out on the front panel.
Now for the roof: as before cut out two panels, the first one 1200mmx500mm, the second panel 1200mmx482mm. (The 18mm less in the second sheet is to allow for the overlap as the 18mm-thick sheets are put together.) The two panels of roofing will need bracing so they stay together, so cut out two simple 45° triangles from the sheet for these. Lay the roof on the kennel with the required overhang front and back, lean in through the door and mark the inside of the kennel on the roof. Use these marks then fasten the braces. They will slip inside the front and back panel and stop the roof moving back and forth.
Screw three 600mm long, 100mmx50mm H4 legs at even spaces to the underside of the kennel - this will strengthen the floor, keep the kennel above any ground moisture and provide ventilation under the kennel.
Our kennel was painted green (Wattyl Solagard 'Envy's Eyes') with a red roof (Wattyl Solagard 'Fire Engine Red'). 'Gloss Black' was used to paint Lizzie's name above the entrance.
Further information
Materials for Lizzie's kennel cost about $100.
Scott's instructions for building a dog kennel are in the August edition of the Burke's Backyard Magazine, available at newsagents and supermarkets for $4.95.
Disclaimer: Burke's Backyard and Backyard Blitz do not accept payment to promote products. All recommendations are genuine. Details on the fact sheets are accurate at the time of publishing, however prices and contact information are not updated and may change.
JOIN NOW
It's free! Sign up now to
join our forums, get
special offers, enter
competitions and bonus
articles