Free Vegie Garden
Not all seeds are dry when they are first collected from a plant. Some, particularly the seeds from many fruits and salad vegetables such as cucumbers and tomatoes, are incased in a mush or pulp. In order to plant the seed, it is necessary to separate the seed from its surrounding fruit.
To find out how to deal with soft fruits so that you can save seeds for replanting, ‘Burke’s Backyard’ visited a commercial seed nursery, Royston Petrie Seeds Pty Ltd at Kenthurst in New South Wales, and spoke to seed expert Roy Petrie.
Roy outlined the steps in collecting seed from soft fruits. The process, which involves fermentation, simulates the conditions of a rotting fruit that’s dropped to the ground or has been eaten by an animal and passed through its digestive system.
Note: Seed saved from hybrid fruit such as that bought at the greengrocer may not come true, that is produce identical fruit.
Step-by-step
What you’ll need:
-
mature fruit such as tomato, rockmelon, cucumber, capsicum
- a small bowl
- a kitchen sieve
- access to a hose
- a shaded, airy position
- paper bags or envelopes for storing seed
What to do:
Step 1: Select fruits that are ripe or fully mature. This is easier to arrange in your own vegetable garden. Shop-bought produce, although it can be used for seed, may have been harvested before the seed it contains becomes fully mature. Immature seed is less likely to germinate.
Hint: To decide if a fruit is fully mature look at its size, colour and softness. Green capsicums for instance are immature. When they are ripe they are fully red and may be a little soft.
Step 2: Remove the seed from inside the fruit. This can be done by spooning or squeezing out the pulp from the seed cavities and placing it in a small bowl.
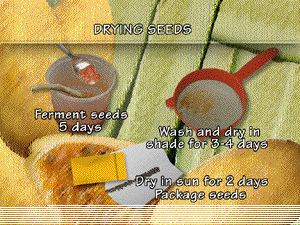
Step 3: Add a little water and allow the pulp mixture to ferment in a warm spot for about five days. To aid fermentation, stir the liquid a couple of times a day. The fermentation process allows the seeds to be separated from the jelly-like pulp that surrounds them. Fermentation will occur more quickly in warm weather. In cool conditions select the warmest spot.
Step 4: To remove the seeds from the fermented liquid empty it into a kitchen sieve, selecting a sieve size smaller than the seeds you are collecting. Use a high pressure jet of water from the hose to wash away the pulp, leaving clean seeds behind.
Step 5: Leave the seeds in the sieve to dry in a shaded, airy spot. Do not dry them in the sun as the wet seeds, with their high moisture content, can be cooked in hot sun. The seeds could also be spread out on newspaper to dry in a sheltered spot. Allow seeds to dry in this way for three or four days stirring them occasionally.
Step 6: Once the seeds are dry to touch they can be put in the sun to complete their drying. This may take two days.
Step 7: The dry seeds can be packaged up in envelopes or paper bags while they continue to dry out and reduce their moisture content. They shouldn’t be placed in plastic or in sealed jars at this stage as they will sweat. Mark the type of seed on the envelope and store in a cool, dry place until it is time to plant or sow the seed.
Sowing the seeds
Mostly seeds collected in this way are collected at the end of the growing season so would not be sown immediately. They would need to be saved for some months until the optimum planting time comes around. For complete details on planting times, methods and correct spacing for specific plants, refer to a general planting guide such as Yates Garden Guide. This book is available at most nurseries and bookshops for around $17.95.


