Composting Leaves
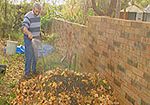
In the autumn the leaves on deciduous trees and shrubs turn fabulous shades of gold, scarlet, crimson, orange and purple. However, when the spectacular display is over the leaves fall and can be very messy. Some people burn the leaves or put them in the garbage, but these ‘solutions’ to the problem are not good for the environment. Far better to compost the leaves and return the valuable nutrients they contain to your soil. Don demonstrated how to use autumn leaves as the basis for a simple compost heap in the backyard.
What is composting?
Composting is a method of speeding up the decomposition of organic materials. Micro-organisms (ie bacteria and fungi) in the compost heap use carbon and nitrogen to make protein. During this process heat is produced and this speeds up the decomposition. To work properly, compost heaps should contain organic materials (such as leaves, animal manures and grass clippings), micro-organisms, moisture and oxygen. It is also important to turn the heap frequently.
Easy composting
Ingredients:
- Autumn leaves
- Lawn clippings
- Fertiliser or manure
- Vegie scraps
- Water
- Garden soil, optional
Method
- Rake up fallen leaves. Putting them through a shredder or running over them with the lawn mower is a good idea because it increases the surface area available to the micro-organisms.
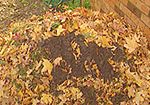
- Choose a site for the heap. Don suggested a patch of dirt the backyard that is out of sight or even under a shrub, such as a camellia. Another option is to dig a pit about a metre or 3′ square and approximately 200mm (8″) deep. Build compost heaps on top of the soil, not on concrete or plastic sheeting.
- Start your heap with a layer of leaves about 100-150mm (4″-6″) thick. Cover that with a thinner layer of grass clippings (50-100mm or 2-4″), and then sprinkle on some animal manure, such as Dynamic Lifter. If you have any kitchen scraps add those too.
- Continue adding layers until all your organic materials are used up. The ideal size for a compost heap is around 1.5m (5′) high. Lightly water the heap after you add every layer or every second layer.
- If you are worried about the leaves blowing around, sprinkle some soil on top of the final layer. You do not want to exclude air by covering the heap so add just enough soil to weigh the heap down.
- Wait for about a month, then turn the heap over once every week or 10 days. The compost should be ready to use in about 8 weeks. The process can take up to 8 months if the heap is not turned.
Some organic material (for example food scraps, animal manures and lawn clippings) is high in nitrogen, while some is high in carbon (for example sawdust, straw, leaves and paper). For best results, carbon and nitrogen should be added in roughly the same ratio as the micro-organisms use it up, which is approximately 30:1. That is why Don balanced the leaves (high carbon) in his compost heap with layers of manure, grass clippings and kitchen scraps (high nitrogen). Don’t worry too much about trying to balance the carbon and nitrogen exactly. The best approach in a home gardening situation is to add a variety of ingredients to the compost heap, and never add too much of one thing.
Further reading
‘Gardening Down-under – A Guide to Healthier Soils and Plants’ by Kevin Handreck
(CSIRO Publishing, $39.95, ISBN 0643066772). Available from major book stores or mail-order from CSIRO Publishing, PO Box 1139, Collingwood, Vic, 3066, on the web at www.publish.csiro.au, via email at [email protected] or phone (03) 9662 7666 in Melbourne, or 1800 645 051 (FreeCall within Australia).