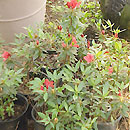
A few years ago on ‘Burke’s Backyard’, Don propagated some azaleas (the single, salmon pink, tall-growing variety ‘Splendens’) from cuttings. Those cuttings have now grown into strong, healthy plants. Growing plants from cuttings is a very cheap and easy way to produce more plants. It’s also the way to go if you are growing a hedge or border and need plants that are uniform, because cutting-grown plants are identical to their parents and to each other.
Growing plants from cuttings
Late spring and early summer are good times to take azalea cuttings.
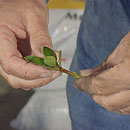
- Use sharp, clean secateurs to take cuttings of new growth that has just hardened off (called semi-hardwood). Select your cuttings from a healthy, vigorously growing plant. The best time to take the cuttings is early morning or late afternoon. Keep the cuttings cool and moist until you are ready to use them, by placing them in moist newspaper in a cooler, or stand them in a container of water.
- Fill a clean, recycled pot or a seed tray with propagating mix (available by the bag or make your own free-draining mix using 50:50 peat moss and sharp sand or perlite).
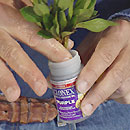
- Take cuttings about 10cm (4″) long, and trim the base of the stems just below a node. The nodes placed in the soil will form roots while the ones above the ground will produce leaves. Remove any flower buds and all except about two leaves. If the remaining leaves are large, cut them in half to reduce moisture loss and to allow the cuttings to fit snugly in the propagating pot. Dip the stems into a rooting hormone (such as Clonex) to increase the strike rate.
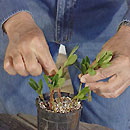
- Using a ‘dibbler’ such as a stick or pencil, make a hole in the propagating mix and insert each cutting. Add a label with the plant name and the date.
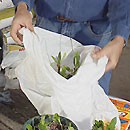
- Water the cuttings then cover them with a mini greenhouse made from bent wire and a plastic bag. Keep the cuttings out of direct sun. Check them occasionally and water them if they are dry.
- When the cuttings form roots (this may take weeks or months) transplant them into individual pots or ‘tubes’, and gradually move them into more light to ‘harden off’. They can then be planted in larger pots or into the garden.