


Originally from Italy, Sergio Ballarin is passionate about helping others. Sergio is a real community man and a valued member of the State Emergency Service since he joined in 1989. His involvement extends to numerous rescue operations, training of volunteers and undertaking extensive training for himself.
Sergio’s wife Angela wanted to surprise him with a new garden, as both a reward for all his hard work and to ease his mind about the state of the garden.
Design intent
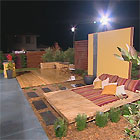
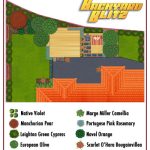
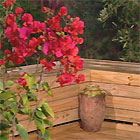
Peter Bachak from Art in Green has designed a formal garden with a Mediterranean influence, to remind Sergio and his family of their beloved Italy. A sloping lawn has been turned into a series of level rooms and privacy has been created with the use of quick growing hedging plants.
Design ideas
A sloping garden can be turned into useable space with the clever use of retaining walls and decks. The designer has increased the usable space at the rear of the house by extending a deck into the garden. The sloping lawn has been graded and the slope decreased to provide more useable space for the kids.
Adapting this plan to your garden
Make a detailed scale drawing of your backyard (eg 1:100) showing the location of the house and major features then incorporate the desired elements from our makeover. As your garden will be a different size you will need to estimate the amounts of materials you will require.
Note: On your plan show the locations of any services (water pipes, sewerage, power, phone, etc) so you can avoid damaging them during the makeover.
Permits and approval: check with your local council regarding regulations about earthworks and drainage. If you are changing existing levels or installing drainage ensure no water run-off is directed toward neighbouring properties. Any water entering the stormwater system must be free of debris and sediment.
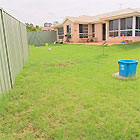
Getting started
A full clear out was needed, so to make access for the excavator and bobcat, a couple of fence panels were removed. Once the turf was all gone, the set-out could begin.
Garden elements
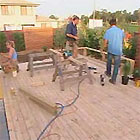
Timber deck and day-bed:
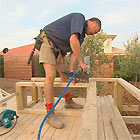
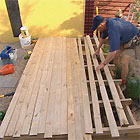
Scott put together a great combination of deck with built in seats and a day bed. 90mm x 90mm H4 treated pine posts were set in concrete 600mm in ground. 190mmx45mm bearers were bolted to the posts with galvanized cup head bolts, onto which 90mmx45mm joists were skew nailed. 90mm x 22mm decking boards were nailed down with a 50mm stainless steel twisted shank nail fired from the nail gun. The day bed was built following the same principles as the deck. Between the two, soil needed to be retained to help form the pebble walkway, H4 sleepers were attached to the posts of the deck and day bed to serve this purpose.
Blitz Tipz: Always treat any cut ends of treated pine with a preservative treatment before installing them in the ground. Appropriate products are sold at timber yards or hardware stores.
Timber bench seats:
Scott built two long bench seats on top of the deck to provide seating and a sense of enclosure. Posts from the deck frame were extended through the decking to support a frame of bearers and joists. Decking boards were laid over this framework and nailed off with the decking gun.
Blitz Tipz: Under the Building Code of Australia any deck more than 1000mm above natural ground level requires a balustrade around the perimeter to be installed.
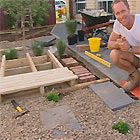
Feature screens:
two different style screens were erected in the garden. Slatted timber screens provide a break to the hedges and add a horizontal focus to the garden beds. Treated pine posts (H4, 90x90mm) installed vertically in ground support treated pine decking boards (90x22mm) nailed horizontally across the face of the posts. A feature wall behind the day bed was constructed using exterior fibre-cement sheets, ceramic tiles and paint. A post and rail frame supports fibre-cement sheets attached with galvanized clouts. Jointing tape and a topcoat plaster mix covers the horizontal joint and provides a smooth surface to attach the tiles to. A flexible adhesive will absorb any movement in the wall and binds the tiles to the sheet behind. White grout between each tile covers the mesh and helps to bind them in place.
Blitz Tipz: Ensure the jointing compound is allowed to completely dry before you sand and paint it.
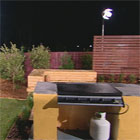
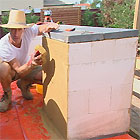
Hebel barbeque:
Nigel built a great block-work barbecue on the existing slab using lightweight Hebel blocks (600mm x 200mm x 200mm). The blocks were laid on top of the existing concrete slab, and set up to accommodate a 5 burner BBQ from Barbeques Galore (Beefmaster 5). A concrete, charcoal coloured paver was laid as a capping and a table top on a mortar bed. All Hebel blocks were bagged using a 4:1 brickies sand and cement mix.
Blitz Tipz: If not building on a concrete slab, then a concrete or brick footing is needed to support the block-work.
Concrete:
the existing concrete slab was given a much needed face lift with a coat of paving paint from Berger. The paint we used was Jet Dry