

It’s no wonder kids love pinatas – they’re colourful, full of lollies and they’re about the only things children are actually encouraged to break! The pinata is said to go as far back as Marco Polo, who discovered it in the Orient and introduced it to the Italians. In turn, the Spanish Conquistadors introduced it to the Mexicans. On December 12, Mexican families celebrate the feast day of Our Lady of Guadalupe with parties, processions, flowers, banners, spicy food and pinatas. Below are Rita Hill’s step-by-step instructions for making your own lolly-filled pinata.
You will need:
balloons
craft glue, such as Clag (or even flour and water)
craft knife
newspaper
cardboard
white paper
tape
acrylic paint
paintbrushes
an old plastic bowl or ice-cream container
Making your pinata
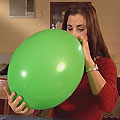
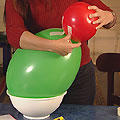
1. Blow up 2 balloons, a large one for the body and a smaller one for the head. Tie them together and, using a bit of tape, secure the head to the body. (Tip: use the ice-cream container to balance your balloons on.)
2. To create a beak or tail, cut out cardboard to make the shape and stick to the balloons with tape.
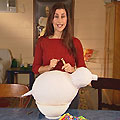
3. Tear the newspaper into pieces, and water down the craft glue. Apply glue to the balloon using the paintbrush, then paste the pieces of newspaper to the balloon. Try and do one layer at a time until you have built up about four layers.
4. The final layer should be white paper, to make painting easier. Tear up the white paper and apply using the same method as you did for the newspaper. (Tip: don’t make the pinata too thick, or it will be too hard for the kids to break.)
5. Before painting, set the pinata aside to dry for a couple of days.
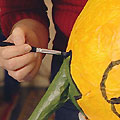
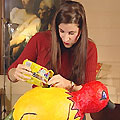
6. When the pinata is dry, pencil in some rough shapes as a painting guide. Rita painted the head bright red, the body bright yellow, and the tail green. She then outlined the whole thing in black.
7. When the paint is dry, cut a 6cm flap in the top using a craft knife (this will burst the balloon) and fill with lollies or treats.
8. Tape the flap closed, string the pinata up to a tree or a clothesline and let the kids smash it open.
Further information
Instructions for making a pinata are in the July 2002 edition of the Burke’s Backyard Magazine, available at newsagents and supermarkets for $4.95.