
Using a Hammer and Nails
Scott Cam, the builder from Backyard Blitz, looked at different types of nails and their uses, and also demonstrated how to use a hammer correctly.
Buy a good hammer
Choose a good quality, tradesman’s hammer, with a flat rather than rounded surface on the head (a good hammer will cost $60 – $100). Scott runs sandpaper over his hammerhead in a crisscross motion every two or three days. This keeps the hammerhead clean and also gives it a rough surface, allowing for better grip with the nail heads.
Nails
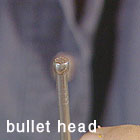
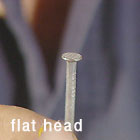
Scott explained that there are basically two types of nails – galvanised, for outdoor use, and bright steel for dry areas inside. They can have either flat or bullet heads. Flat heads are used mostly for outdoor jobs such as fencing or building pergolas, where the head will be visible in the timber. Bullet head nails are driven almost flush with the timber, then punched below the surface using a nail punch. The hole is then filled with putty, and the nail head is completely hidden from view.
Using your hammer
How you use the hammer depends on the job. If you’re working on rough-sawn timber that won’t be seen, a few dents won’t matter. However, take care not to bruise dressed timber, as the whole look of the job could be ruined. Here are Scott’s tips for driving nails into timber:
Hold the nail in position, and rest the hammer on the nail with the face centred on the nail head.
Tap lightly with the hammer to start the nail into the timber. Once the nail is started, you no longer need to hold it in position.
Keeping an eye on the nail head, drive the nail in with a swinging action from the elbow and shoulder.
Remember, practice makes perfect. Scott gives his apprentices timber offcuts and a box of 500 nails, and they spend their first day just practising driving nails into timber.